
Overview
This guide provides IT Managers with step-by-step instructions on how to create and manage forms efficiently within the RAKAN Team Portal. By following this guide, IT Managers can ensure a structured approach to form creation, configuration, and deployment across departments with proper access controls and functionality.
1. Accessing the Forms Management Page
- Log in to the RAKAN Team Portal with your IT Manager credentials.
- Navigate to the My Dashboard section.
- Click Forms in the top navigation menu.
- Click Add New Form to create a new entry.
2. Creating a New Form
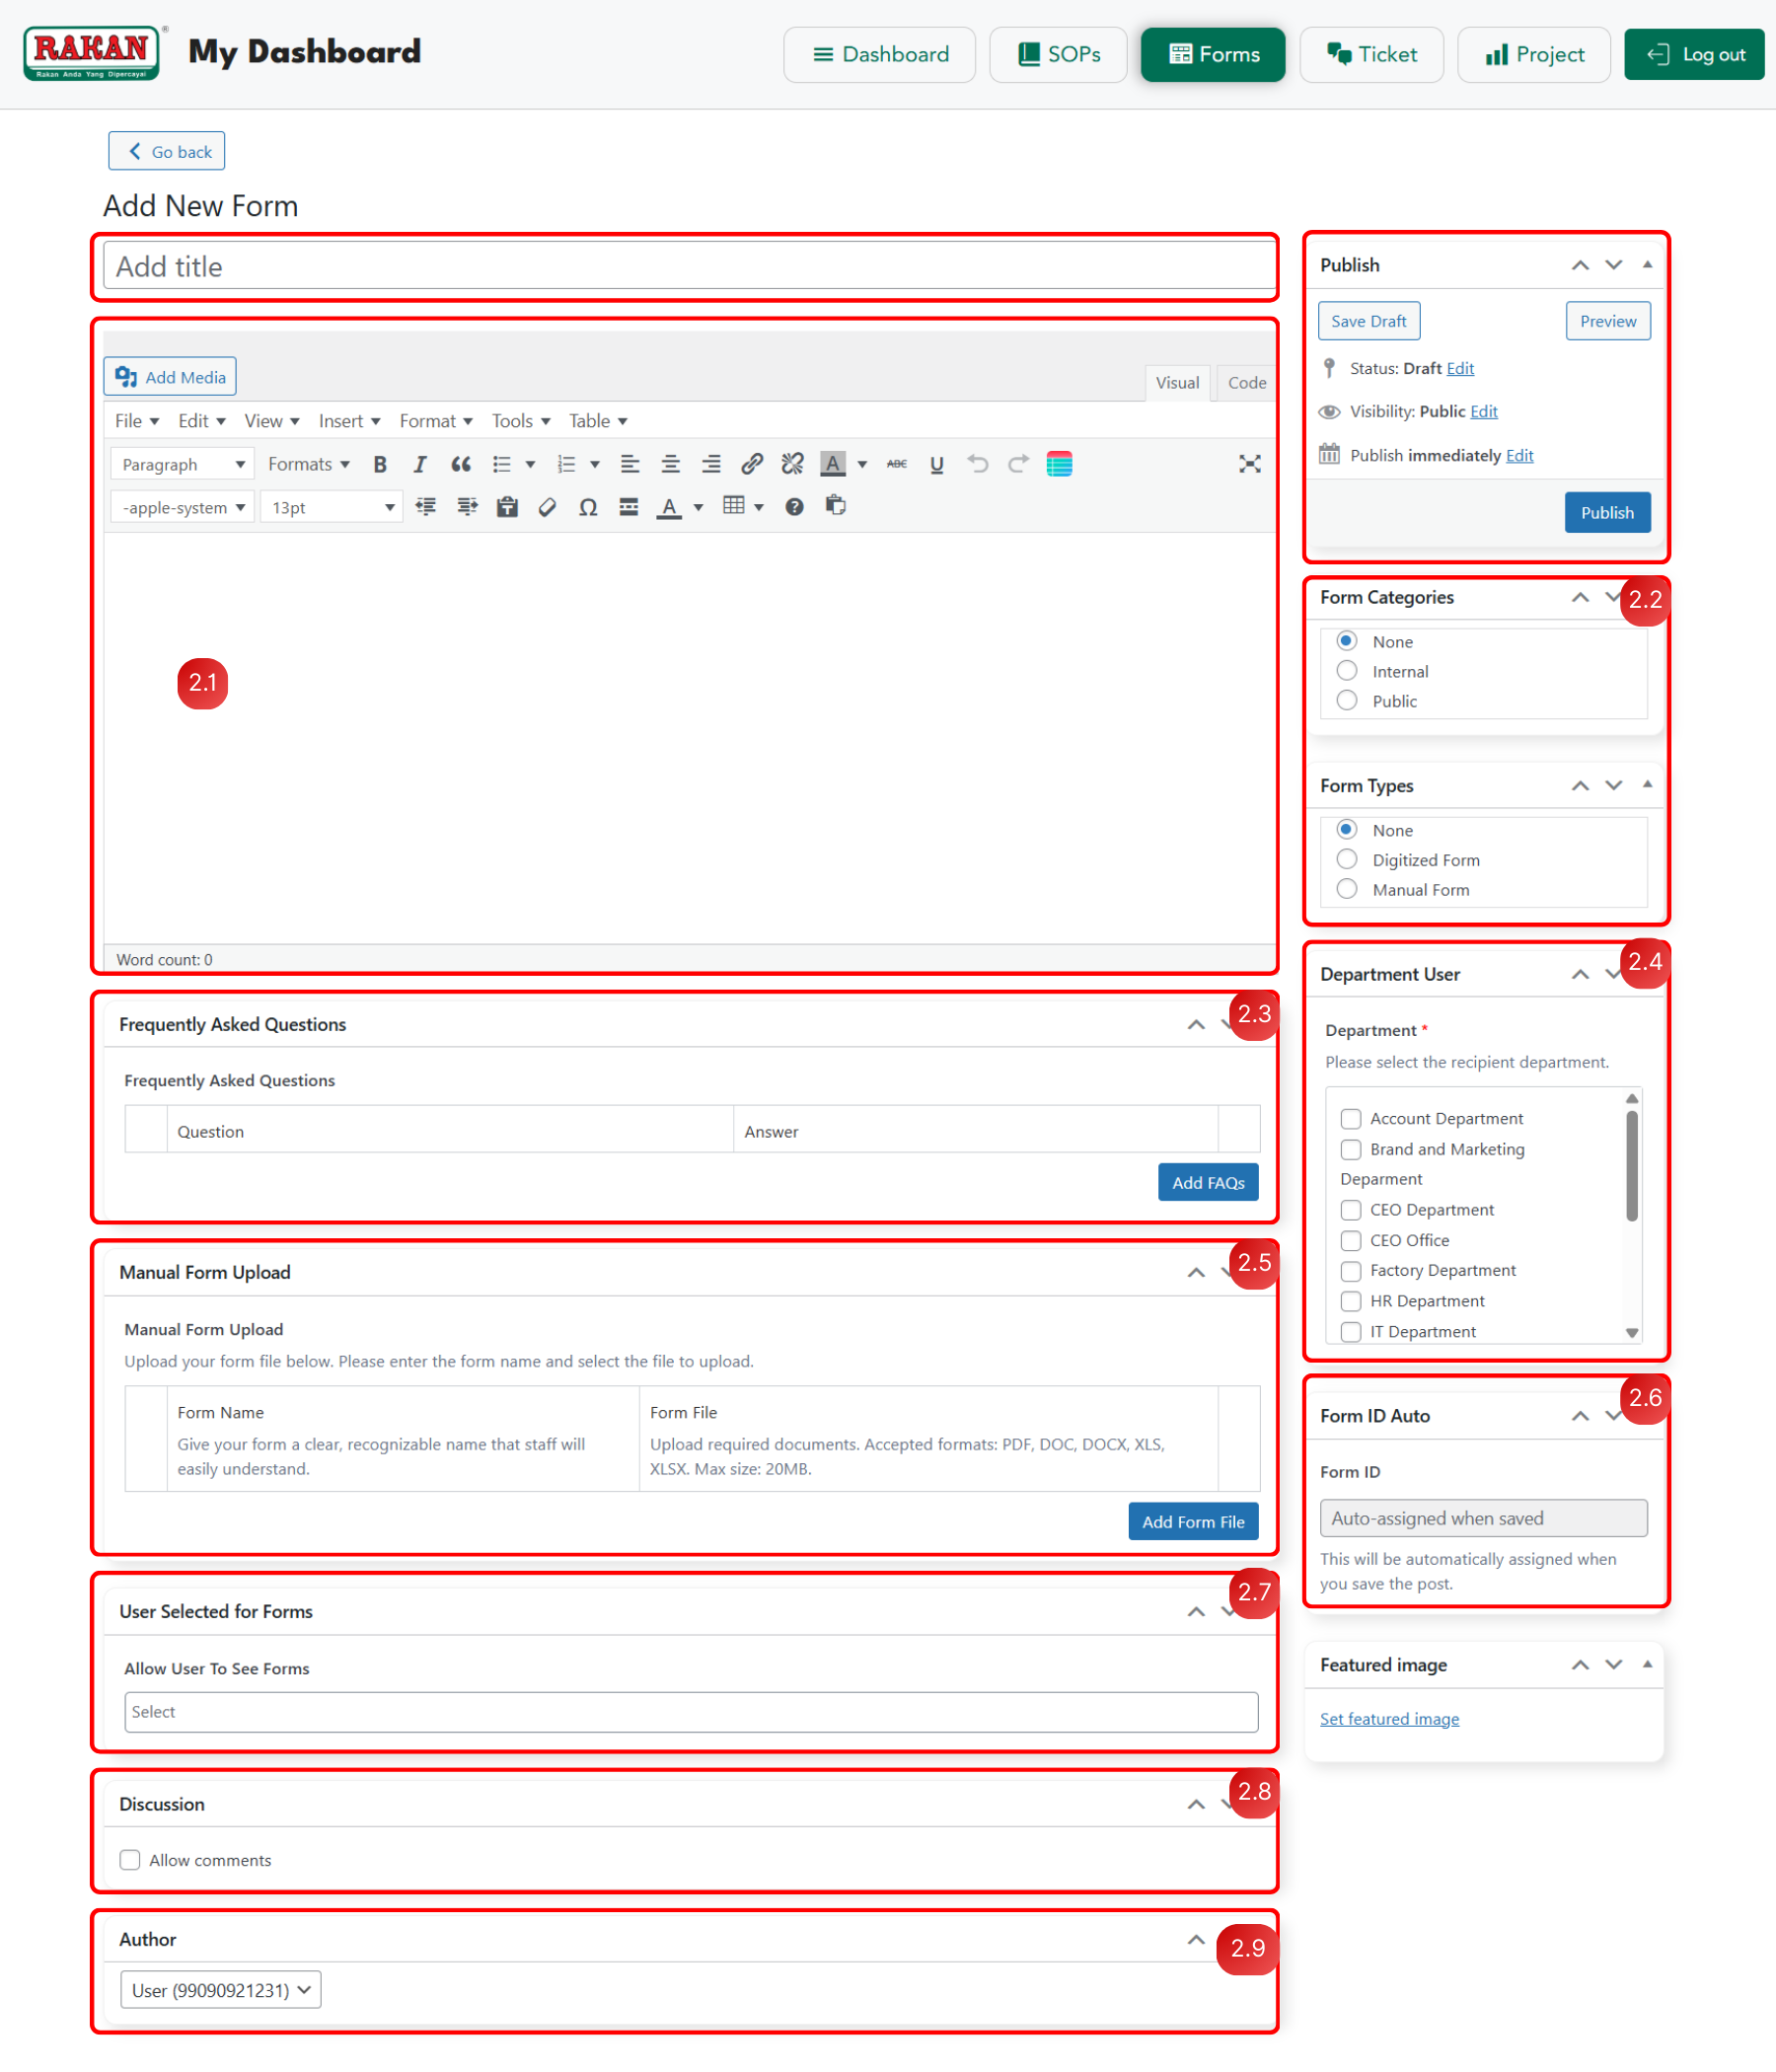
2.1 Entering Form Details
- Title: Enter a clear and concise title in the “Add title” field.
- Content: Use the text editor to add relevant information.
- Use Heading 2 for main sections.
- Use Paragraph for regular text.
- Click Add Media to insert images or documents if necessary.
2.2 Assigning Form Categories
- In the Form Categories section, select the relevant category for the form.
- Available categories include:
- None: No specific category assigned.
- Internal: Forms restricted to specific departments or users.
- Public: Forms that are open and viewable by everyone.
2.3 Adding FAQs (Optional)
- Scroll to the Frequently Asked Questions section.
- Click Add Question to include frequently asked questions related to the form.
- Question Field: Enter clear, concise questions users might have.
- Answer Field: Provide comprehensive, helpful responses.
- Example: For HR-related forms, include questions about submission procedures, approvals, etc.
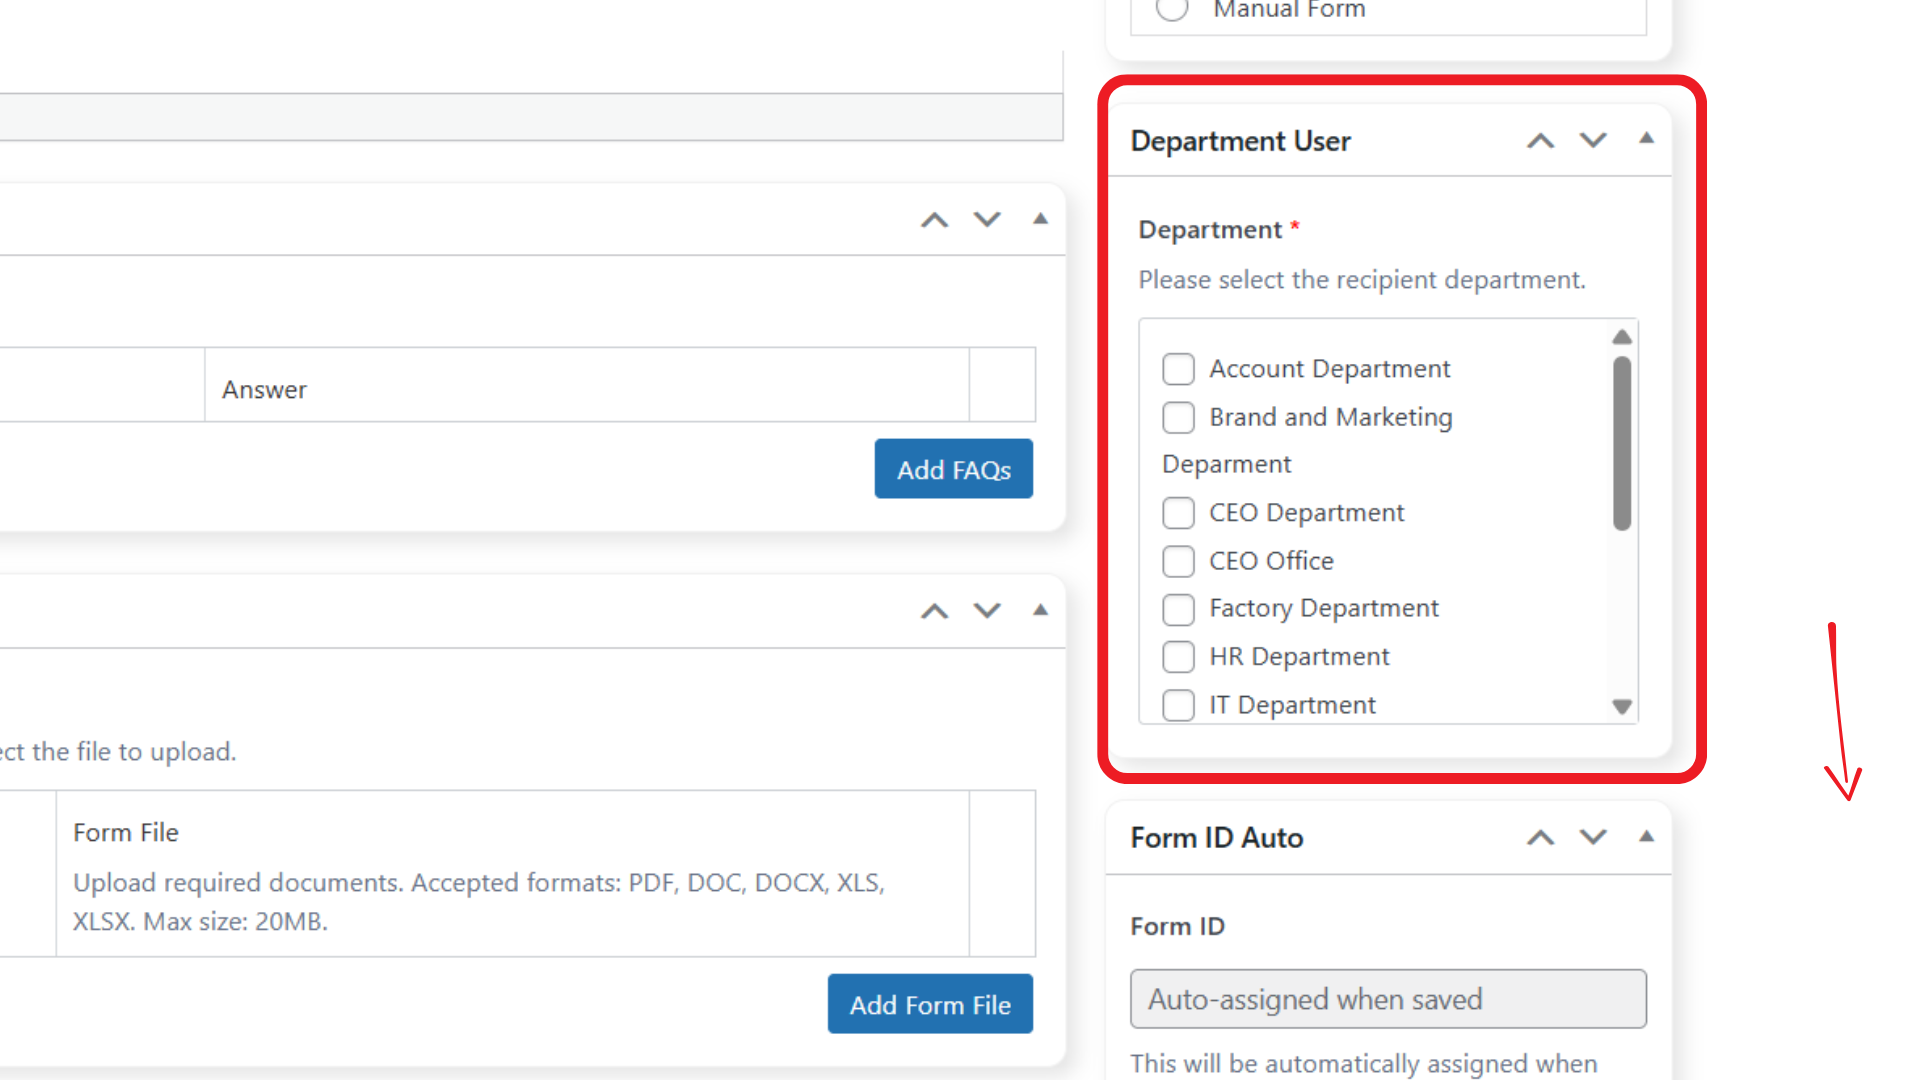
2.4 Choosing the Department (Mandatory)
- Department Selection: Choose the target department(s) from the checkbox list.
- Multiple Selection Allowed: You can select multiple departments as needed.
- Available departments include:
- Account Department
- Brand and Marketing Department
- CEO Department
- CEO Office
- Factory Department
- HR Department
- IT Department
Note: Department selection is required for proper access control and form visibility.

2.5 Manual Form Upload Configuration
- Form Name: Enter a descriptive name (e.g., “Employee Onboarding Form”).
- Form File: Upload required documents with these specifications:
- Accepted Formats: PDF, DOC, DOCX, XLS, XLSX
- Maximum File Size: 20MB
- Upload Process: Click Add form file to complete the file upload.
2.6 Form ID Auto-Generation
- Form ID: Enable automatic ID assignment when form is saved.
- Auto-assignment: IDs are automatically generated when you save the form.
- Benefits: Ensures unique identification and tracking for each form submission.
2.7 User Access Management (Optional)
- User Selected for Forms: Allow designated users from other departments to access Internal forms.
- Selection Process: Use the “Allow User To See Forms” dropdown.
- Use Case Example: An HR Manager accessing an IT Department internal form.
- Implementation: Select specific users who require cross-departmental form access.
2.8 Discussion Settings (Optional)
- Navigate to the Discussion section in the form editor.
- Check Allow Comments to enable user feedback on forms.
- Moderation: Comments can be moderated through Settings > Discussion menu.
- Use Cases: Useful for forms requiring user clarification or feedback.
2.9 Author Management
- In the Author section, select the appropriate user from the dropdown.
- Default: Form creator is automatically assigned as author.
- IT Manager Role: Can assign authorship to other appropriate personnel.
- Use Case: Assign to department heads or subject matter experts for specific forms.
")
3. Publishing Options
3.1 Setting Visibility
- In the Publish box, adjust the visibility settings:
- Public: Visible to all users.
- Password Protected: Only accessible with a password.
- Private: Only visible to administrators.
3.2 Scheduling a Form
- By default, forms are published immediately.
- To schedule for a future date:
- Click Edit next to “Publish immediately.”
- Select the desired date and time.
- Click OK, then Schedule.
3.3 Saving or Publishing
- To publish immediately, click Publish.
- To save as a draft, click Save Draft.
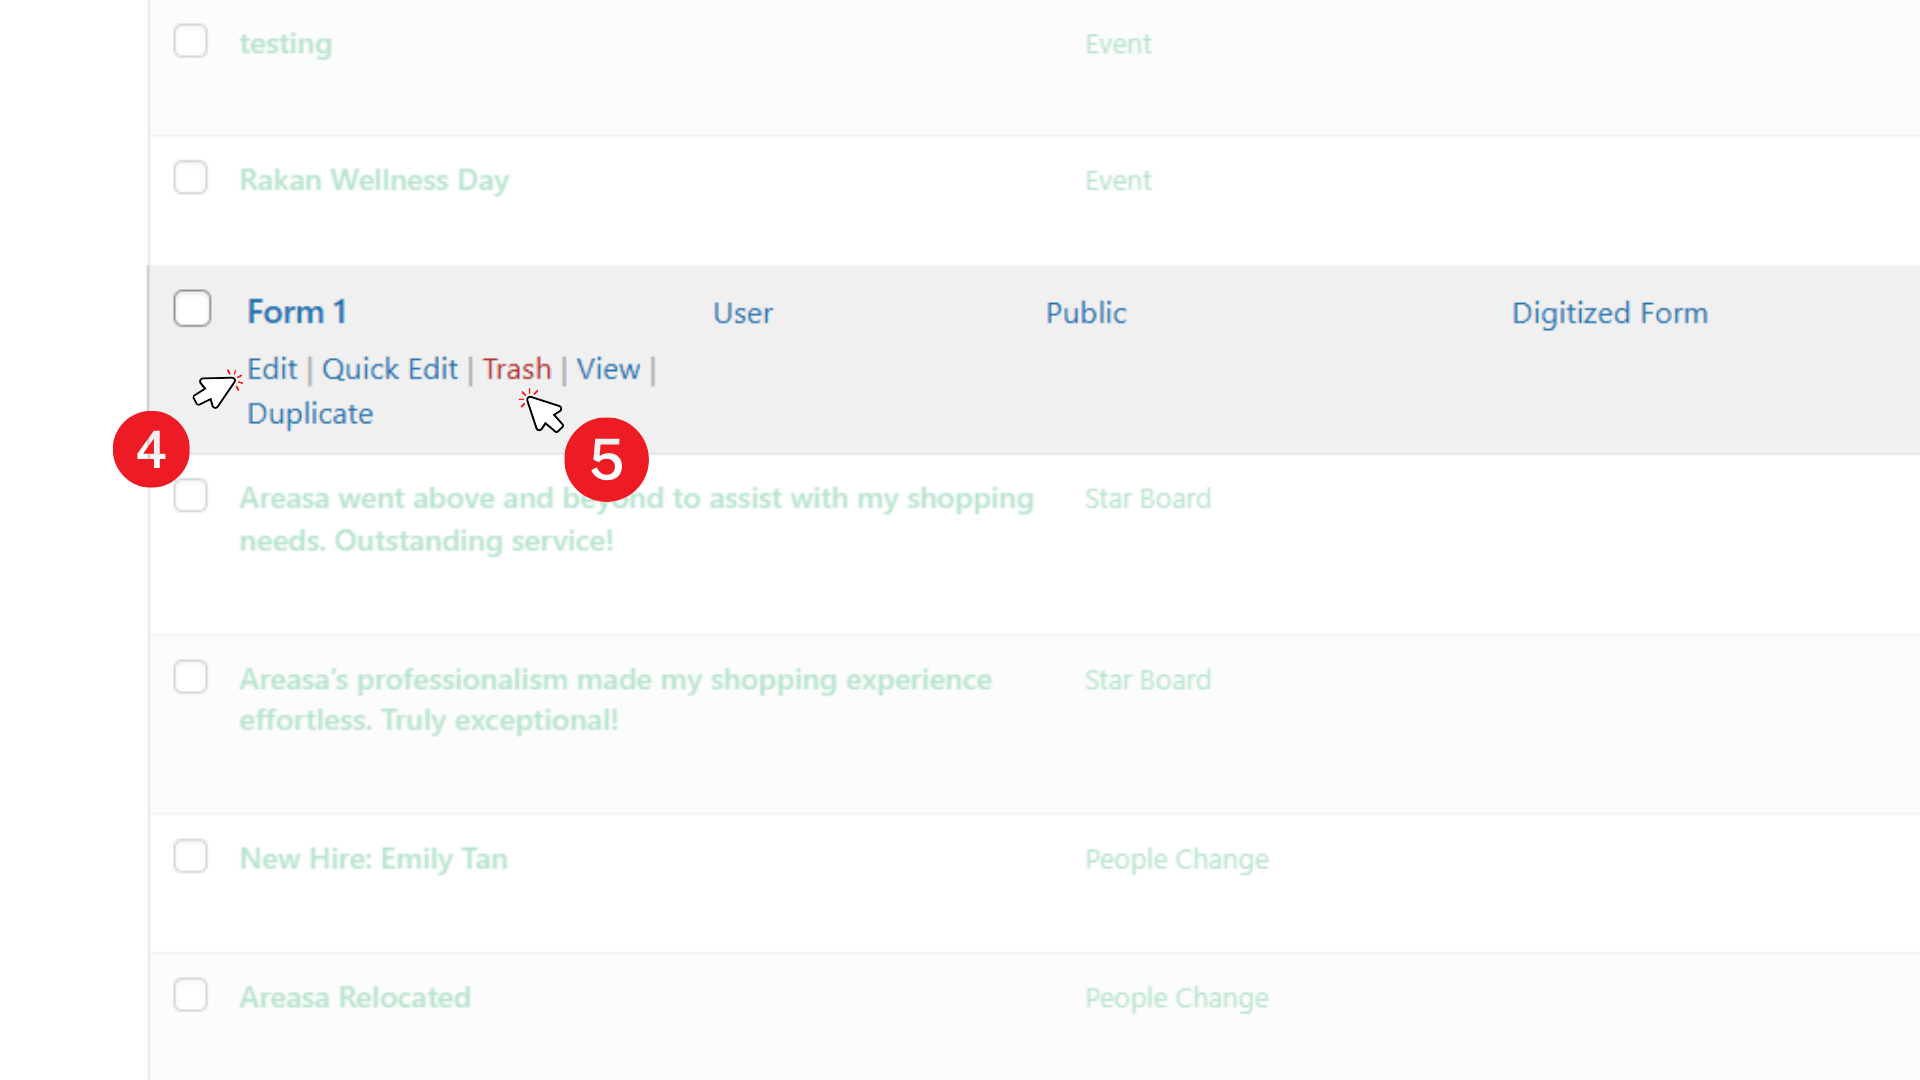
4. Editing an Existing Form
- Navigate to the Forms page in the admin menu.
- Use the search bar to locate the form.
- Click Edit to make changes.
- Modify the content, attachments, or categories as needed.
- Click Update to save modifications.
5. Deleting a Form
- Navigate to the Forms page.
- Locate the form to be removed.
- Click Move to Trash.
- To permanently delete:
- Go to the Trash tab.
- Click Delete Permanently.
- If needed, restore a form from the Trash before permanent deletion.
6. Key Points to Remember
- A featured image enhances form identification and should follow recommended specifications.
- Department selection is required to ensure proper access control.
- Use appropriate categories and tags for better organization.
- Visibility settings determine who can access the form.
- User access for specific cases can be managed using the “User Selected for Forms” dropdown.
- Forms can be edited at any time, but changes should be reviewed before updating.
By following this guide, IT Managers can efficiently manage forms within the RAKAN Team Portal.