
Overview
This comprehensive guide provides Project Admins and Managers with detailed instructions for creating, configuring, and managing projects within the RAKAN Team Portal. As a Project Admin/Manager, you have full control over project settings, team management, workflow configuration, and advanced analytics to ensure successful project delivery.
Role Comparison Table
| Capability | Project Admin/Manager | Team Member | Viewer |
|---|---|---|---|
| Create Projects | ✅ Full Access | ❌ No Access | ❌ No Access |
| Manage Team Members | ✅ Add/Remove/Assign Roles | ❌ No Access | ❌ No Access |
| Configure Project Settings | ✅ Full Configuration | ❌ No Access | ❌ No Access |
| Create/Edit Tasks | ✅ All Tasks | ✅ Assigned Tasks Only | ❌ View Only |
| Upload Files | ✅ Unlimited | ✅ To Assigned Tasks | ❌ Download Only |
| Add Comments | ✅ All Tasks | ✅ Assigned Tasks | ❌ View Only |
| View Analytics | ✅ Full Analytics | ✅ Personal Analytics | ✅ Project Analytics |
| Export Data | ✅ All Data | ✅ Personal Data | ✅ Reports Only |
| Time Tracking | ✅ View All + Personal | ✅ Personal Only | ✅ View All |
| Workflow Management | ✅ Full Control | ❌ No Access | ❌ View Only |
1. Understanding Project Admin/Manager Role
1.1 Role Capabilities and Responsibilities
As a Project Admin/Manager, you have comprehensive access to:
Project Management:
- Create and configure new projects
- Archive completed projects
- Duplicate successful projects for reuse
- Access all project settings through the 3 dot button
Team Management:
- Add and remove team members
- Assign role-based permissions
- Monitor team performance and workload
- Manage member access levels
Configuration Control:
- Customize project workflows and stages
- Configure notification settings
- Set up project templates
- Manage project backgrounds and labels
1.2 Accessing Project Management
To access your Project Management dashboard:
- Log into your RAKAN Team Portal account
- Click on the “Project” button in the main navigation
- Your dashboard displays:
- All projects under your management
- Project creation and management tools
- Team performance analytics
- System-wide project statistics
2. Creating and Configuring Projects
2.1 Creating a New Project
To create a new project:
- Click the “+ Add Project” button in the top-right corner
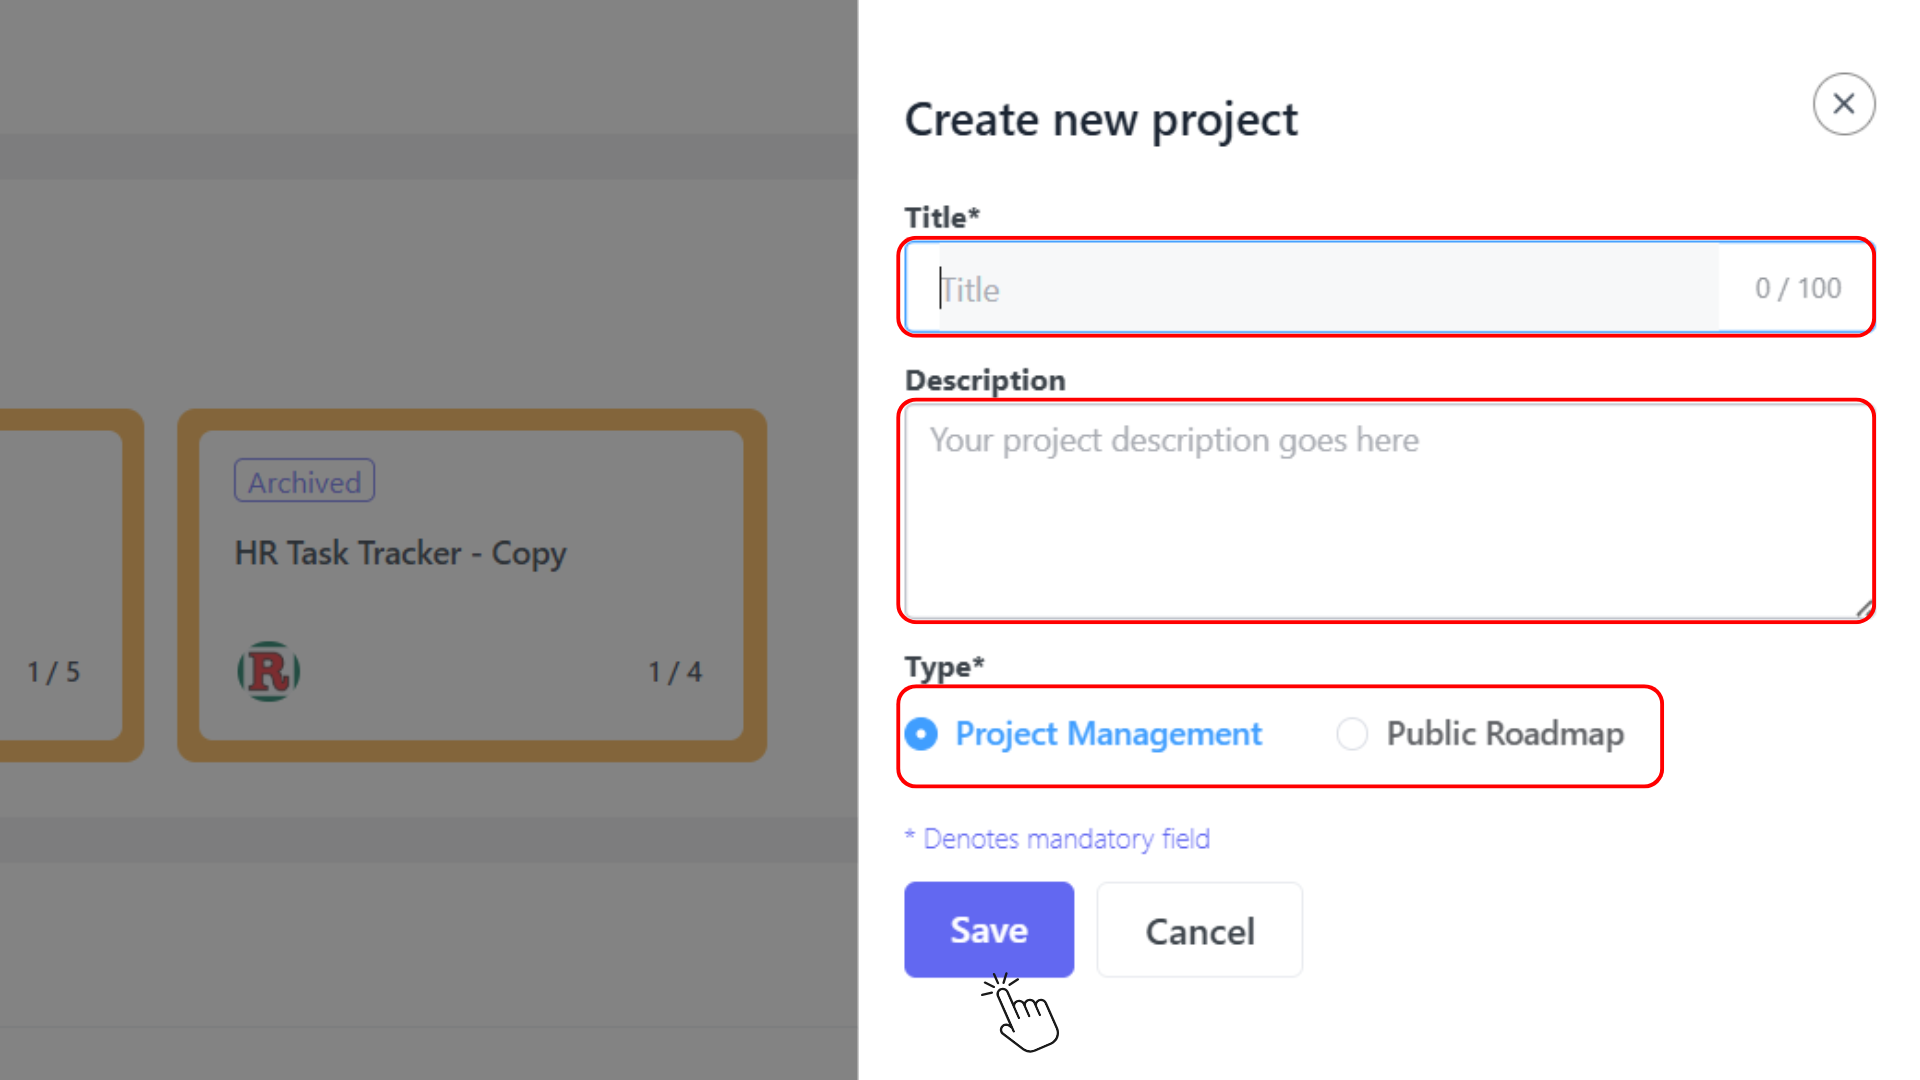
- The “Create new project” dialog will appear
2.2 Project Configuration
Complete the project setup form with the following information:
Essential Project Details:
- Title* (Required): Enter a clear, descriptive project name
- Character limit: 100 characters
- Examples: “Q1 Marketing Campaign”, “Website Redesign 2025”
- Description: Provide comprehensive project information
- Include project objectives, scope, and deliverables
- Support for rich text formatting
- No character limit for detailed documentation
Project Type Selection* (Required):
- Project Management: Internal team collaboration with full feature access
- Public Roadmap [No need to use] : External stakeholder visibility with controlled access
2.3 Saving Your Project
After entering the project details:
- Review all entered information for accuracy
- Click the “Save” button to create the project
- Click “Cancel” to discard changes and return to the dashboard
Your new project will appear on the Projects section and is ready for task management.
3. Project Settings and Configuration
3.1 Accessing Project Settings
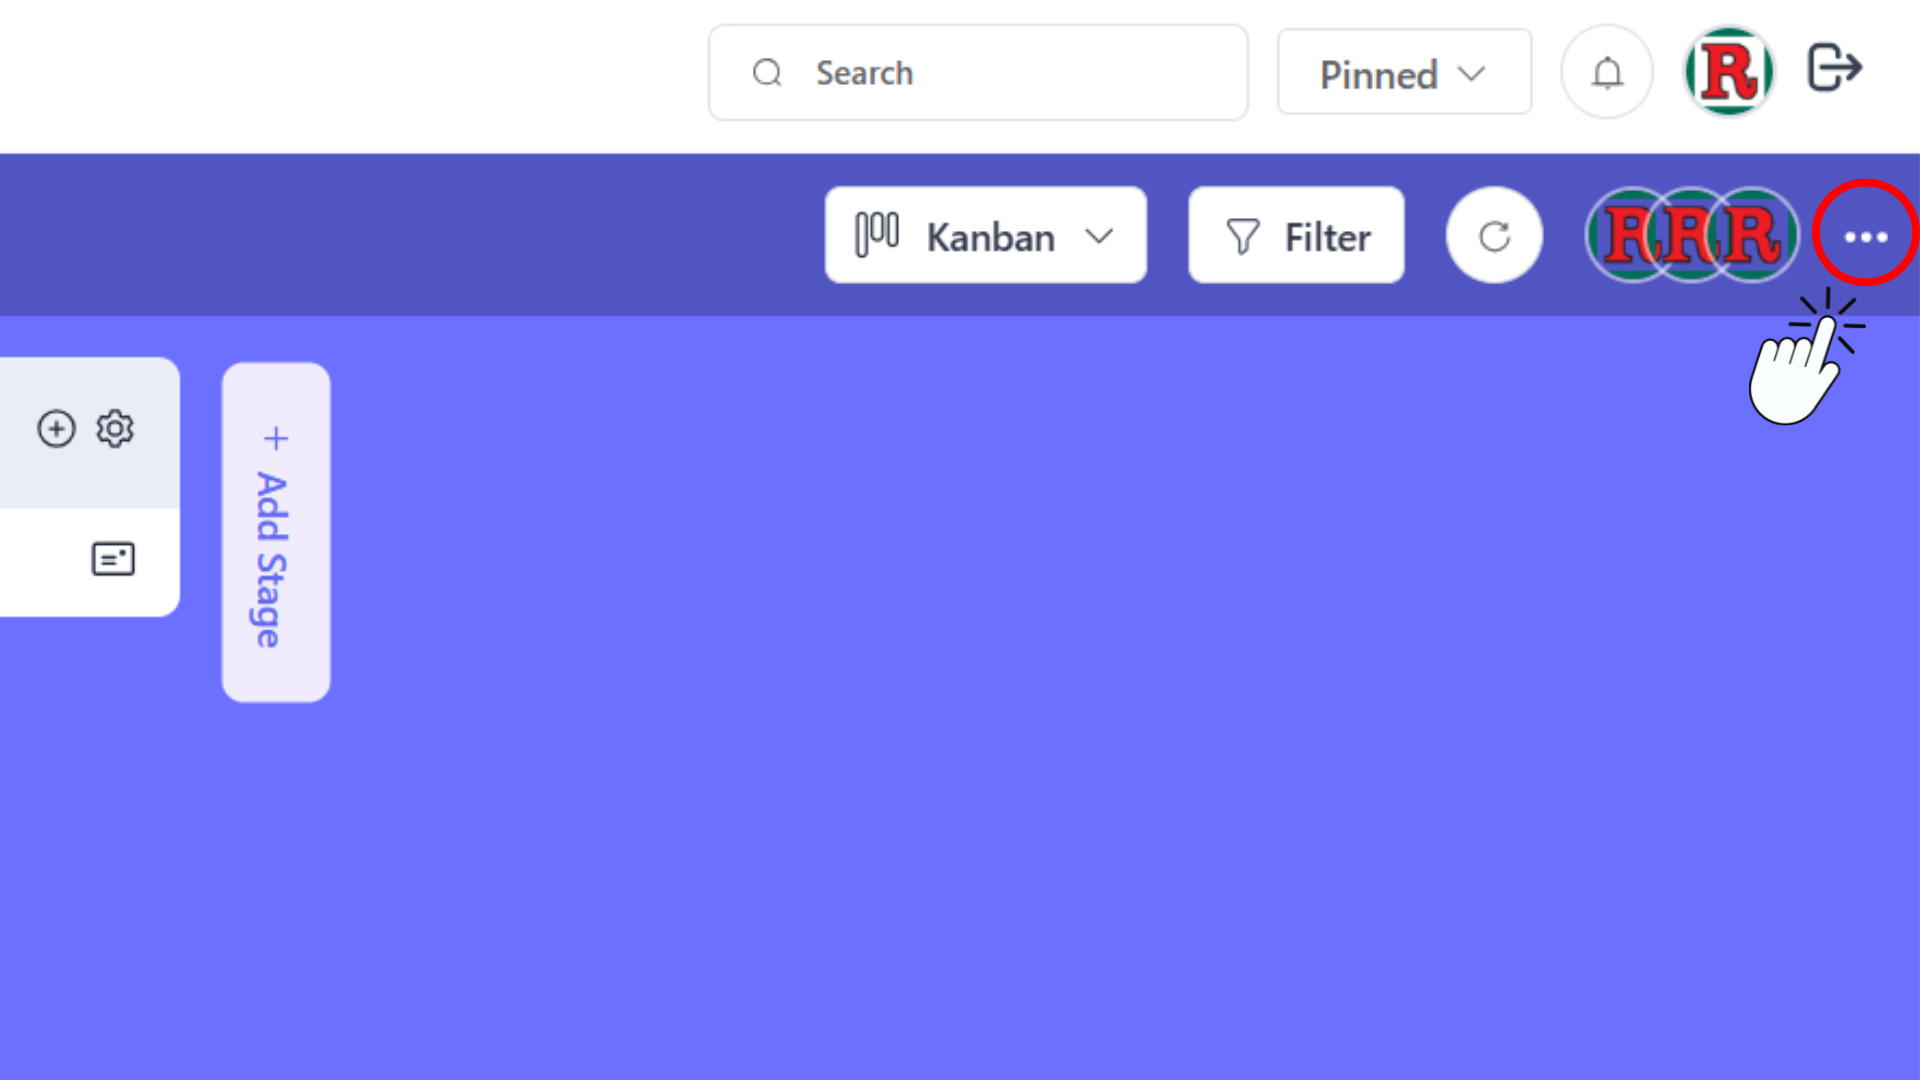
To access any project setting or configuration:
- Open your project
- Click the 3 dot button (⋯) in the top-right corner of the project interface
- The Project Menu will open with all available options
3.2 Project Menu Options
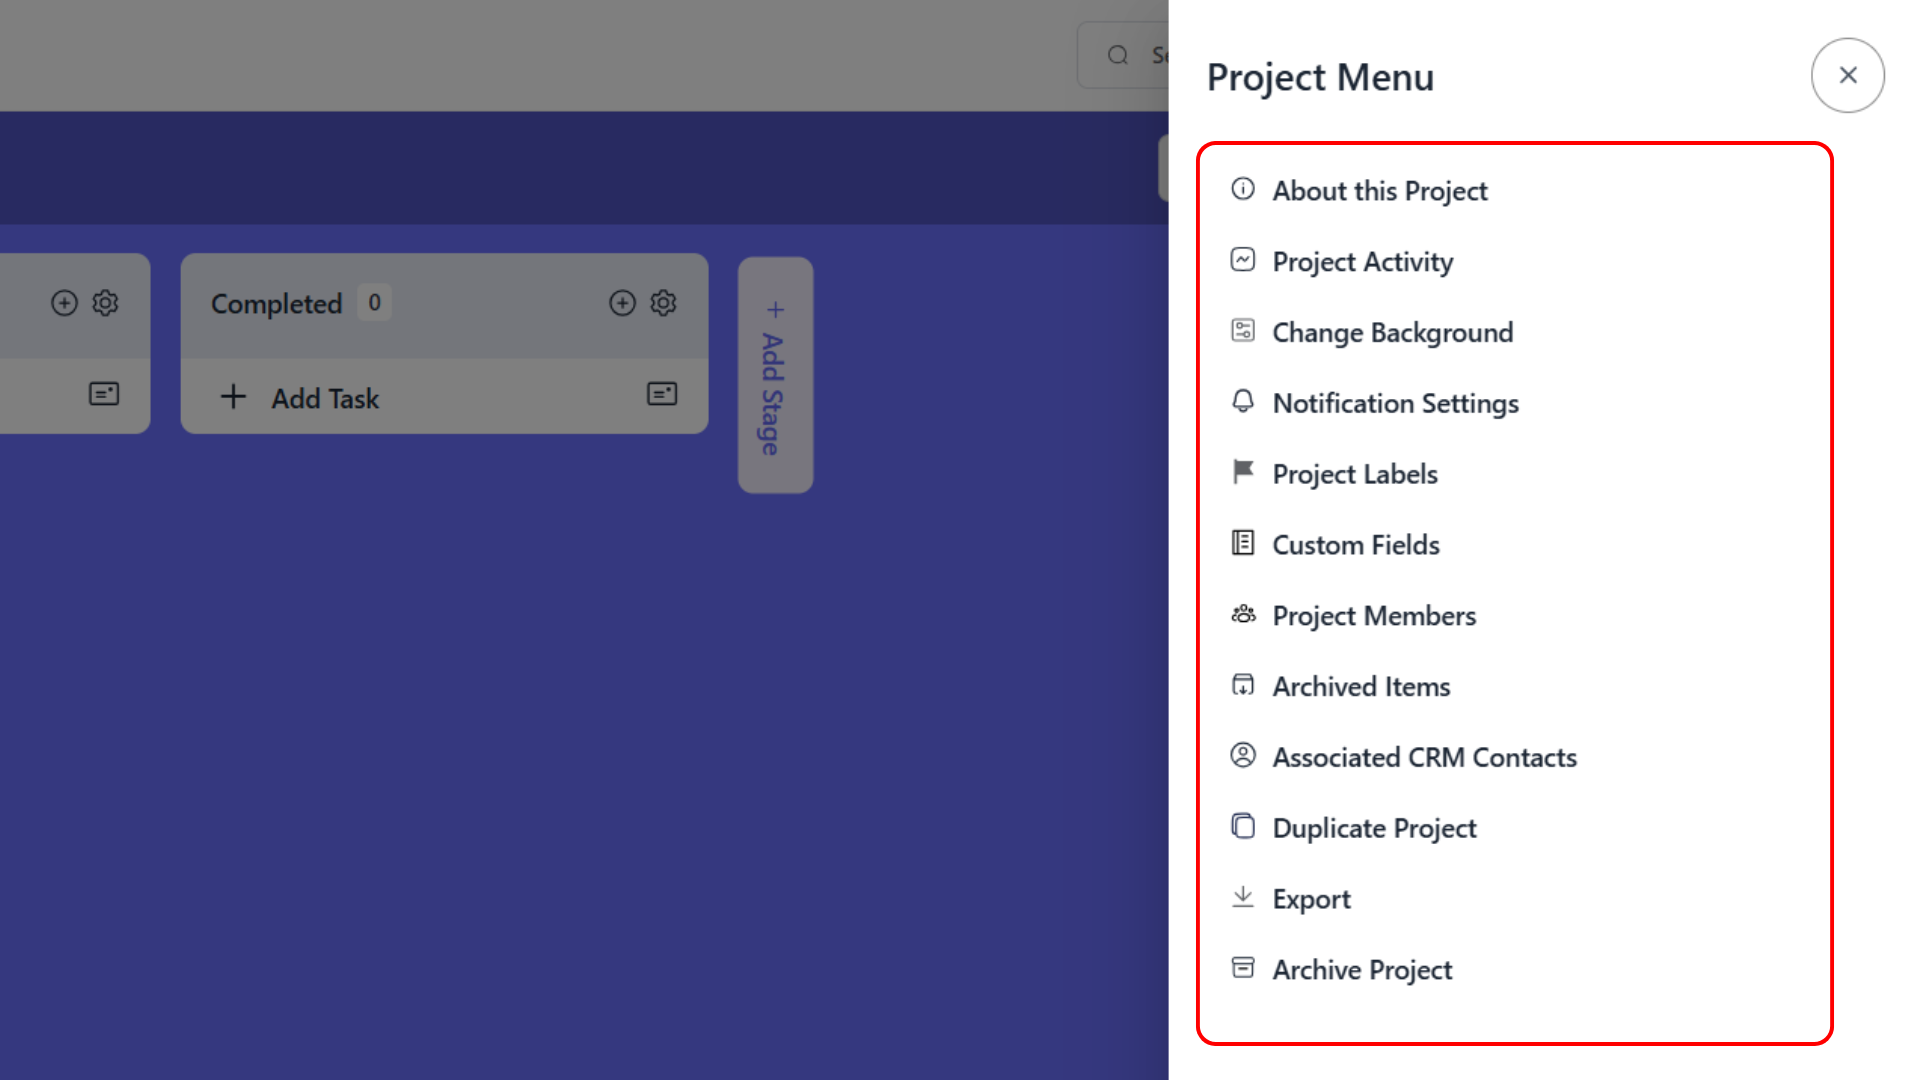
When you click the 3 dot button, you’ll see these options:
Project Information:
- About this Project: View and edit project details
- Project Activity: Monitor all project activities and changes
Project Customization:
- Change Background: Customize project visual appearance
- Project Labels: Manage task categorization labels
- Custom Fields: Set up additional project data fields
Team and Notifications:
- Notification Settings: Configure project-wide notifications
- Project Members: Manage team members and permissions
Project Management:
- Archived Items: View and restore archived tasks
- Associated CRM Contacts: Link CRM contacts to project
- Duplicate Project: Create a copy of this project
- Export: Export project data and reports
- Archive Project: Archive completed project
3.3 About This Project
To view or edit project information:
- Click the 3 dot button (⋯)
- Select “About this Project”
- Review project details including:
- Project title and description
- Creation date and project type
- Project statistics and progress
- Team member count and activity
3.4 Project Activity Monitoring
To monitor all project changes:
- Click the 3 dot button (⋯)
- Select “Project Activity”
- View comprehensive activity log including:
- Task creation and modifications
- Team member actions
- Status changes and updates
- File uploads and comments
4. Project Customization
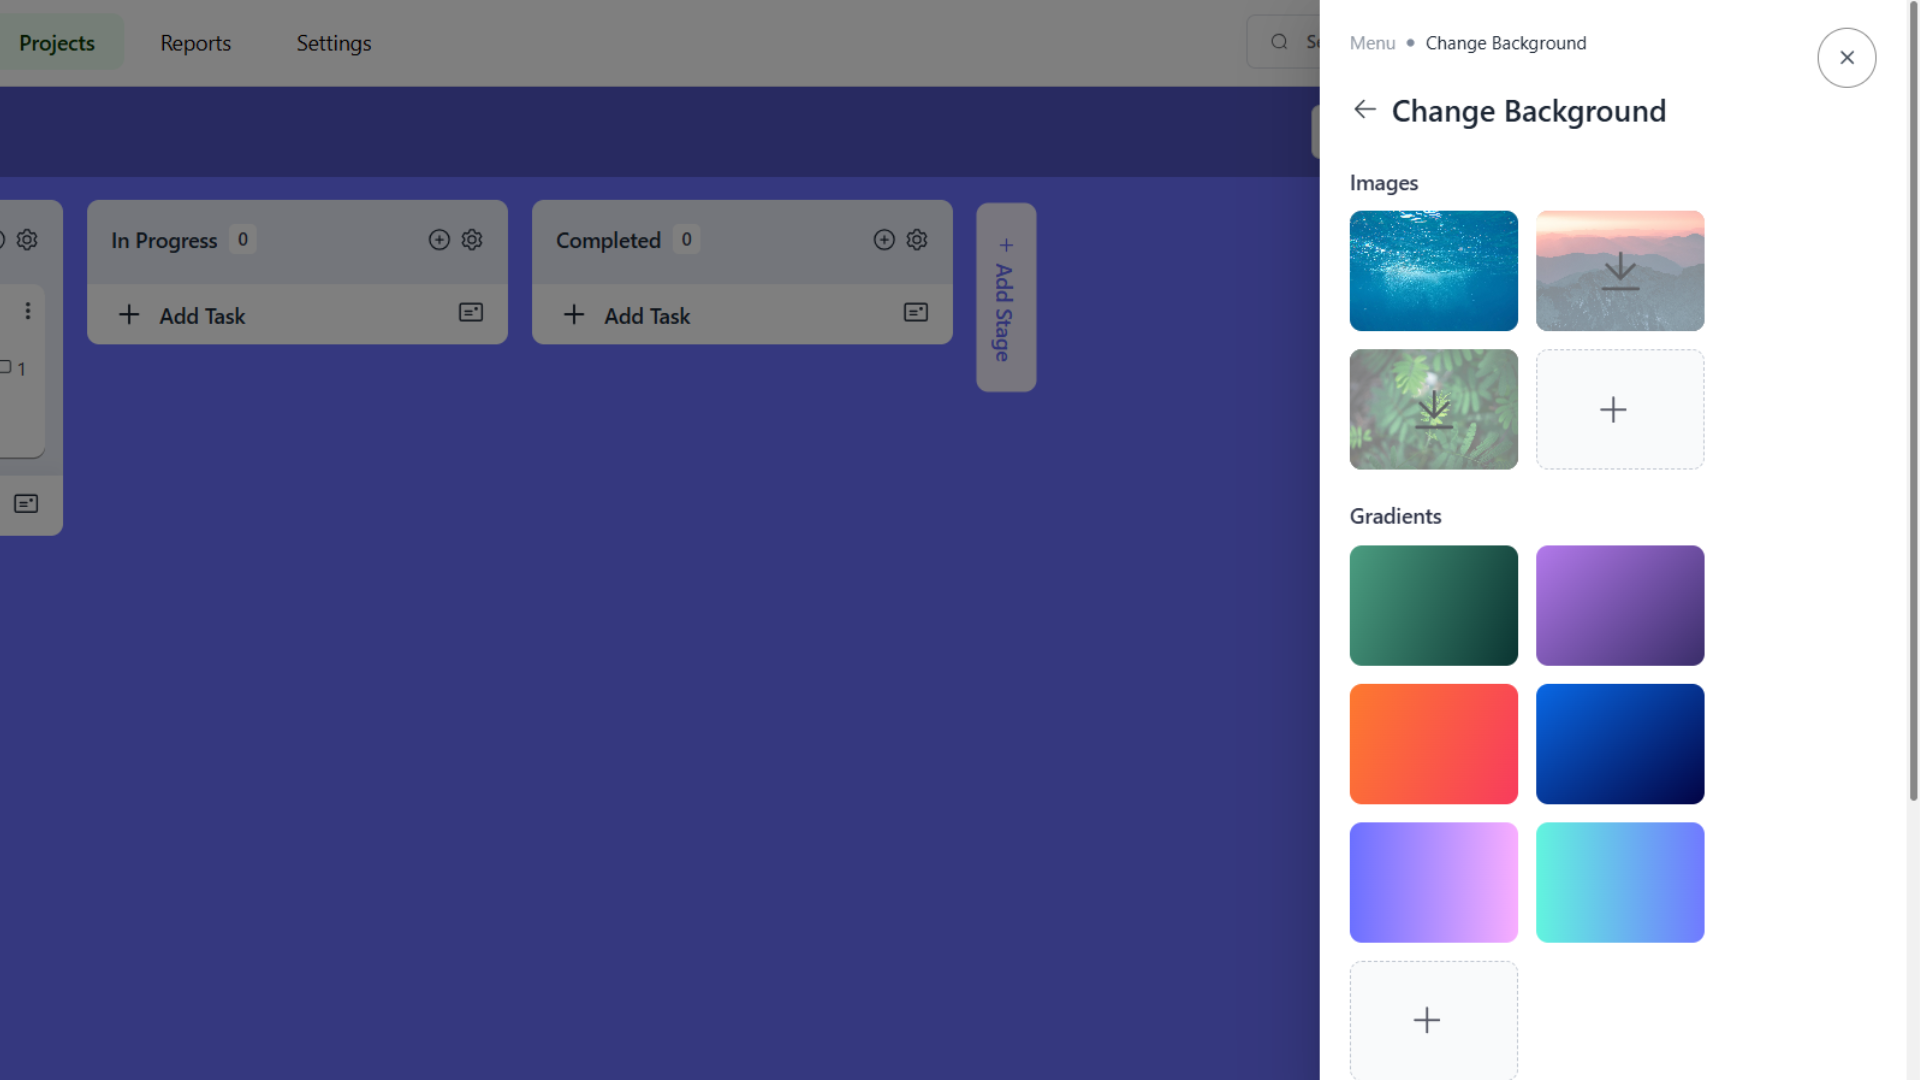
4.1 Changing Project Background
To customize your project’s visual appearance:
- Click the 3 dot button (⋯)
- Select “Change Background”
- Choose from available options:
Background Options:
- Images: Select from pre-designed background images
- Gradients: Choose from colorful gradient backgrounds (green, purple, orange, blue, cyan)
- Custom Upload: Upload your own background image using the “+” button
4.2 Managing Project Labels
To organize tasks with custom labels:
- Click the 3 dot button (⋯)
- Select “Project Labels”
- Manage labels:
- Create new labels for task categorization
- Edit existing label names and colors
- Delete unused labels
- Apply labels to tasks for organization
4.3 Custom Fields Setup
To add additional project data fields:
- Click the 3 dot button (⋯)
- Select “Custom Fields”
- Configure additional fields:
- Add custom data fields for tasks
- Set field types and requirements
- Organize project-specific information
- Standardize data collection
5. Team Member Management
5.1 Accessing Team Management
To manage your project team:
- Click the 3 dot button (⋯)
- Select “Project Members”
- The Project Members panel will open
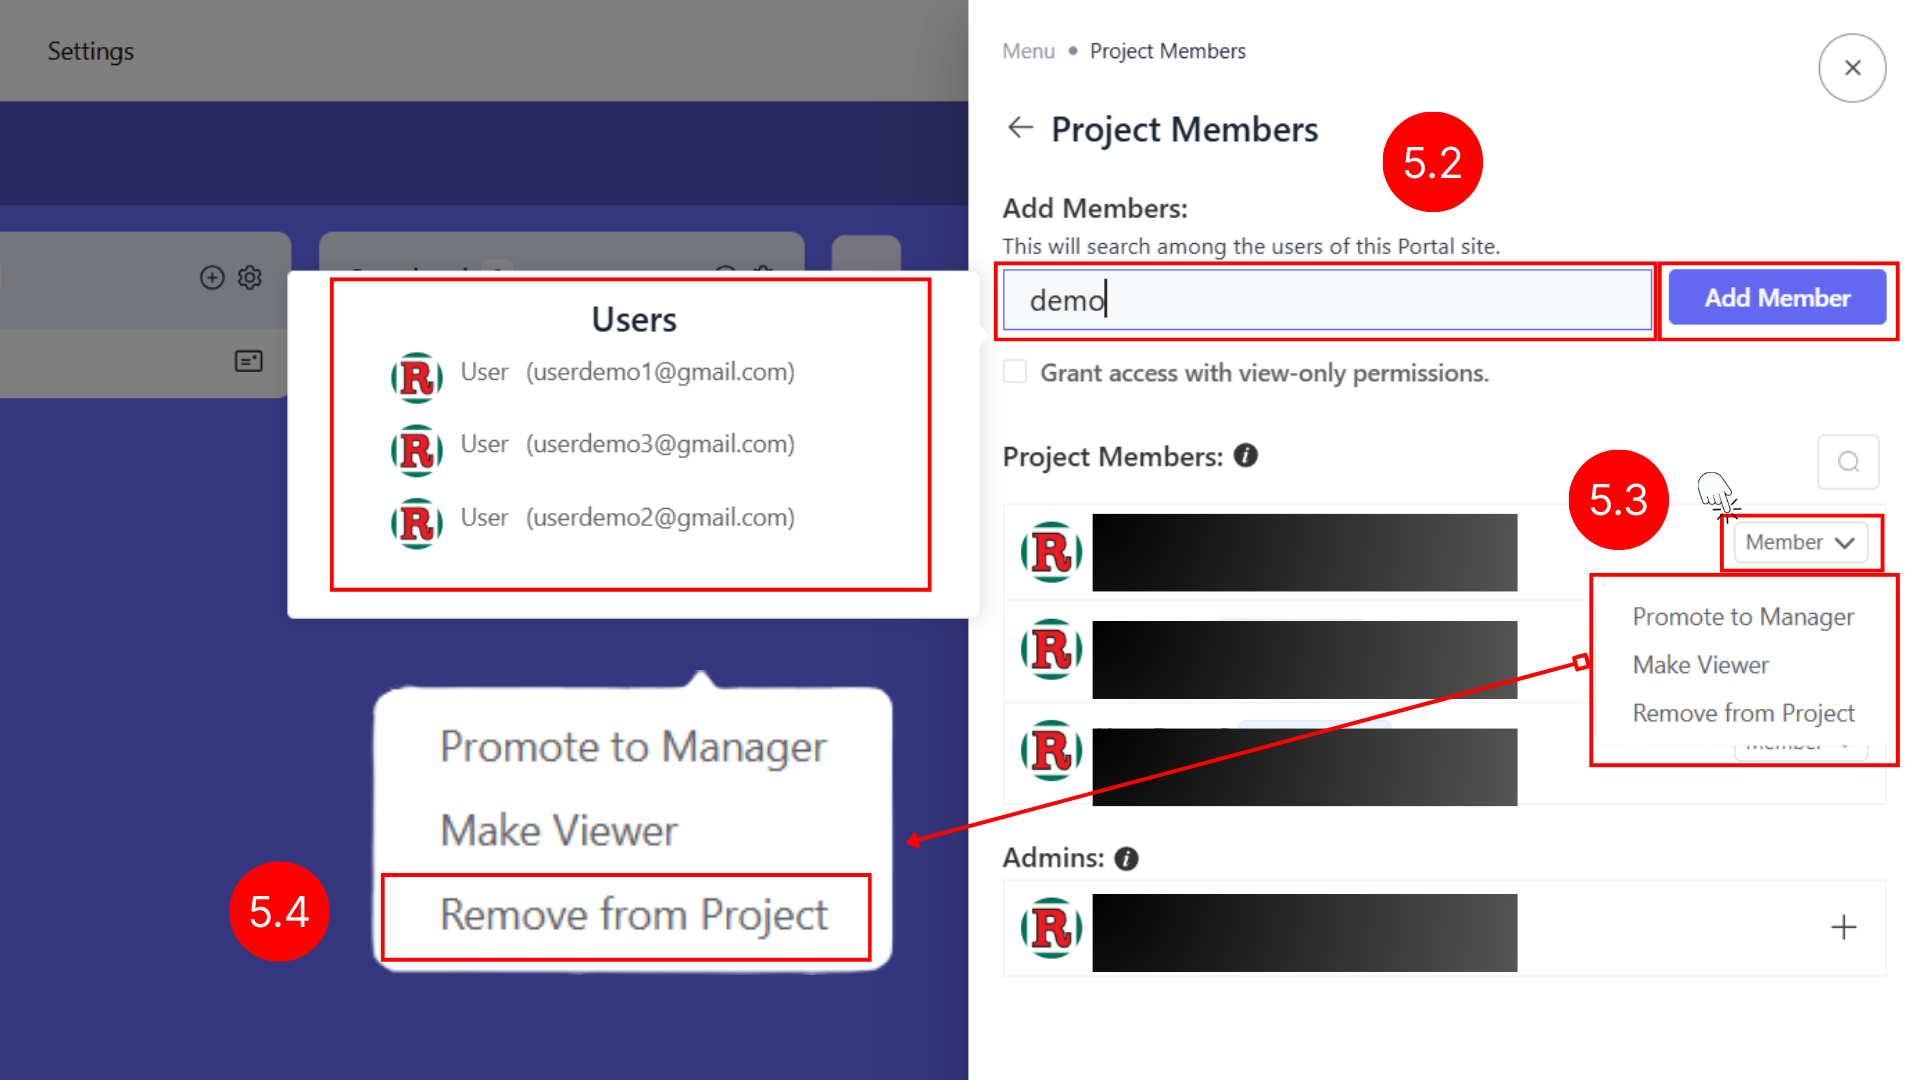
5.2 Adding Team Members
To add users to your project:
- In the Project Members panel, click “Add Member”
- Select users from the available list
- Assign appropriate roles:
- Member: Can create and manage tasks
- Viewer: Read-only access to project information
- Click “Add” to confirm
5.3 Managing Member Roles
Role Management Options:
- Change Role: Switch between Member and Viewer roles
- Set to View-Only: Restrict user to read-only access
- Remove User: Remove user from project entirely
Role Change Process:
- Find the user in the Project Members panel
- Click on their current role dropdown (e.g., “Member”)
- Select new role from available options:
- Promote to Manager: Give full project management access
- Make Viewer: Change to read-only access
- Remove from Project: Remove user completely
- Confirm the change
5.4 Removing Team Members
To remove a team member from your project:
- Click the 3 dot button (⋯)
- Select “Project Members”
- Find the user you want to remove
- Click on their role dropdown
- Select “Remove from Project”
- Confirm the removal
When to Remove Team Members:
- Team member has left the organization
- User no longer needs access to the project
- Role responsibilities have changed
- Project team restructuring
Important Notes:
- Removed users will lose all access to the project
- Their task assignments will remain but need to be reassigned
- Project activity history will still show their past contributions
- Users can be re-added later if needed
6. Notification Settings
6.1 Configuring Project Notifications
To set up project-wide notifications:
- Click the 3 dot button (⋯)
- Select “Notification Settings”
- The Notification Settings panel will open

6.2 Global vs Project-Specific Settings
Global Settings Option:
- Same as global settings: Toggle on to use your global notification preferences
- Go to global settings: Link to configure your overall system notifications
- When enabled, project will inherit your global notification preferences
Project-Specific Settings:
- Turn off “Same as global settings” to customize notifications for this project only
- Configure unique notification preferences for different projects
- Override global settings when needed
6.3 Email Notification Preferences
Enable All Notifications:
- Master toggle to enable/disable all email notifications for this project
- When disabled, no email notifications will be sent regardless of individual settings
- Quick way to turn off all project notifications
Individual Notification Types:
Comment Notifications:
- Purpose: New comments added on a task you are watching
- When triggered: Someone adds a comment to tasks you’re following
- Toggle: Enable/disable comment notifications
Stage Changed:
- Purpose: Stage has been changed of a task you are watching
- When triggered: Tasks you’re following move between workflow stages
- Toggle: Enable/disable stage change notifications
Assigned to a task:
- Purpose: You are assigned to a new task
- When triggered: Someone assigns you to a task
- Toggle: Enable/disable task assignment notifications
Dates:
- Purpose: Dates has been updated of a task you are watching
- When triggered: Due dates or start dates are modified on tasks you follow
- Toggle: Enable/disable date change notifications
Task Archived:
- Purpose: Tasks you are watching are archived
- When triggered: Tasks you’re following are moved to archive
- Toggle: Enable/disable archive notifications
Removed from a task:
- Purpose: You are removed from a task
- When triggered: Someone removes you from task assignment
- Toggle: Enable/disable removal notifications
6.4 Saving Notification Settings
After configuring your notification preferences:
- Review all toggle settings to ensure they match your preferences
- Click “Save” to apply the changes
- Click “Cancel” to discard changes and return without saving
Best Practices for Notification Settings:
- Enable notifications for critical actions (task assignments, due dates)
- Consider disabling non-essential notifications to reduce email volume
- Use project-specific settings for high-priority projects
- Regularly review and adjust settings based on project needs
7. Task Management and Organization
7.1 Creating Tasks

To create a new task in your project:
- Click the “Add Task” button (available in each stage column or at the top)
- Enter your task title in the text field
- Click “Save” to create the task
- Click “Close” to cancel
7.2 Editing Task Details
To open and edit a task:
- Click on any task card to open the task details
- The task panel will open with all task information
Task Information Available:
- Task title and stage location
- Assignees and team members
- Due dates and scheduling
- Priority level (Low, Medium, High)
- Labels and categories
- Description and attachments
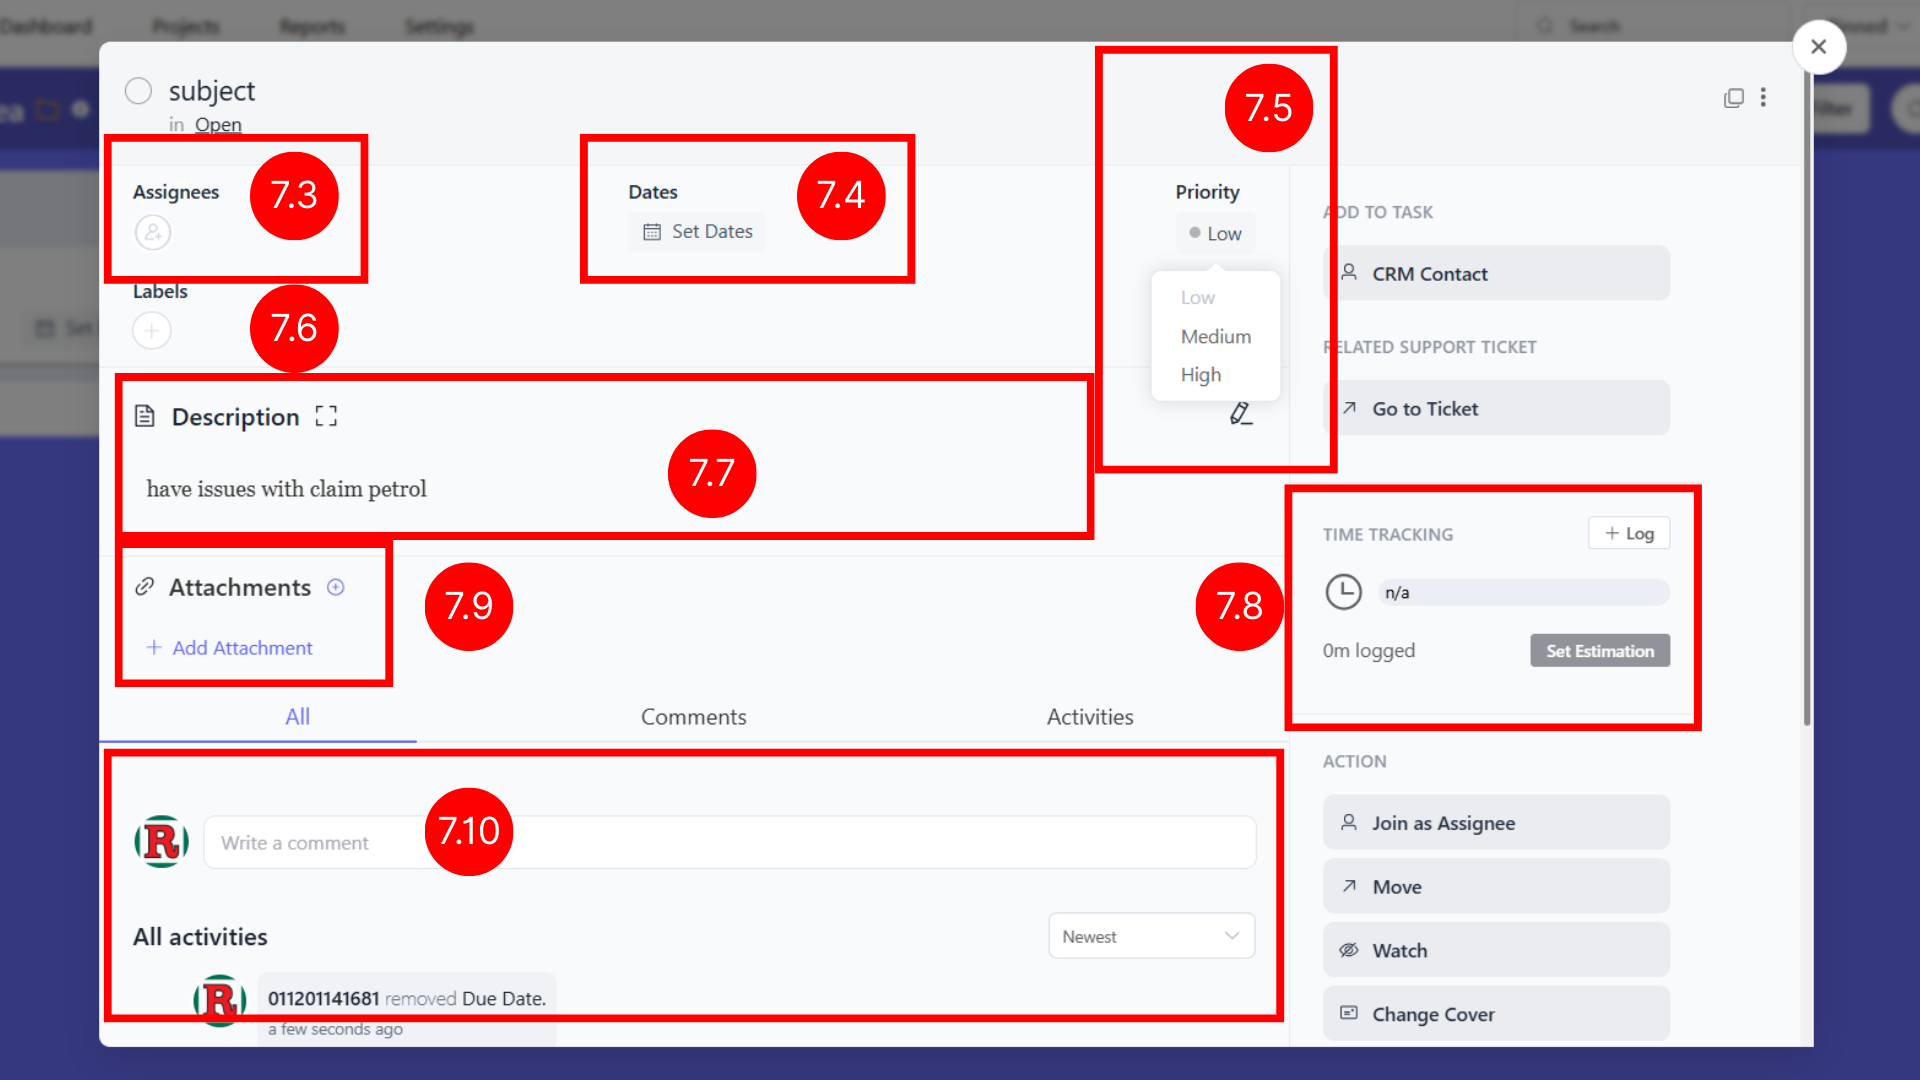
7.3 Assigning Team Members

To assign people to a task:
- Open the task details
- Click on the “Assignees” section
- Select team members from the list:
- Project Members: Current project team
- Other Users: Additional users with project access
- Click the “+” button to add members
- Use the eye icon to give view-only access
7.4 Setting Task Dates
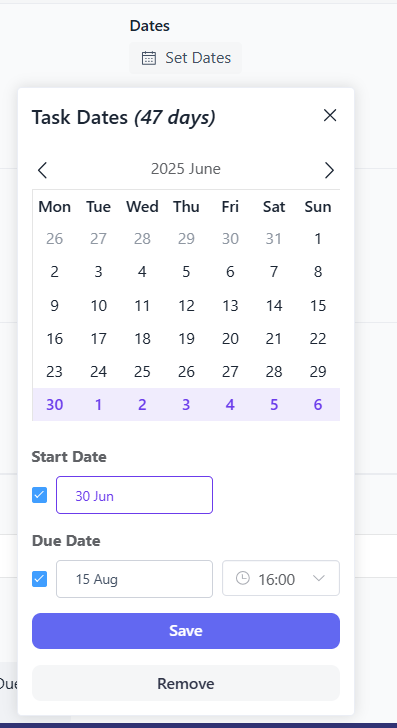
To set task deadlines:
- Open the task details
- Click “Set Dates” in the Dates section
- Use the calendar to select dates:
- Start Date: When work begins
- Due Date: When task should be completed
- Set specific times if needed
- Click “Save” to confirm dates
7.5 Setting Task Priority
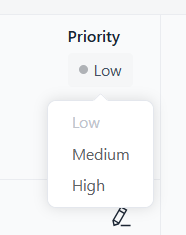
To set task importance:
- Open the task details
- Click on the Priority section
- Select priority level:
- Low: Normal priority tasks
- Medium: Important tasks
- High: Urgent tasks
- Priority shows as colored indicators
7.6 Adding Task Labels
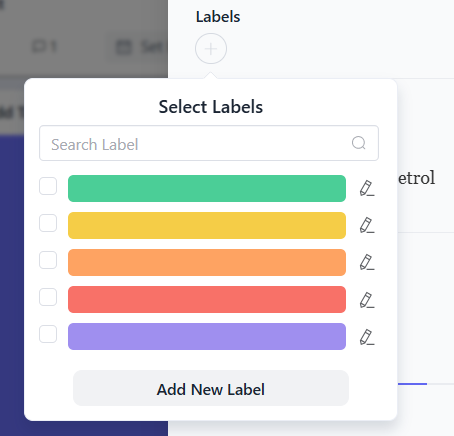
To categorize tasks with labels:
- Open the task details
- Click on the Labels section
- Select from existing colored labels or create new ones
- Use “Add New Label” to create custom categories
- Multiple labels can be applied to one task
7.7 Adding Task Description
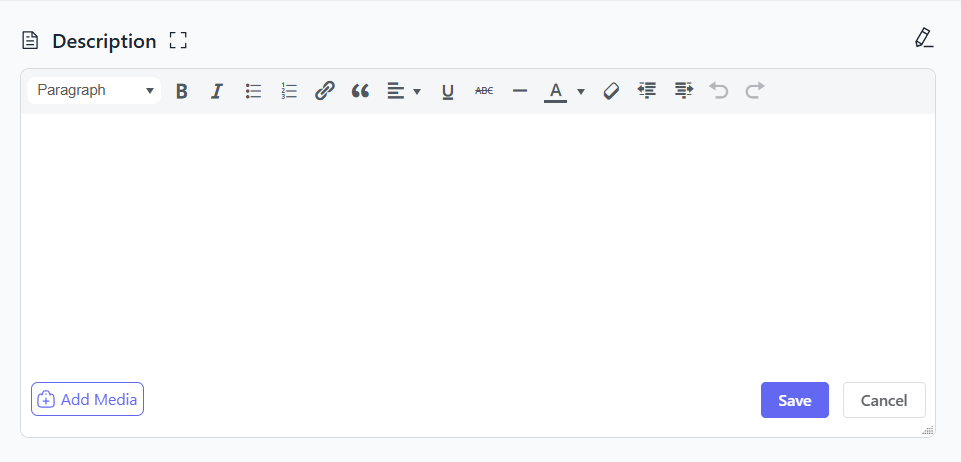
To add detailed information:
- Open the task details
- Click on the Description area
- A text editor will open with formatting tools
- Add detailed task information using the rich text editor
- Use “Add Media” to insert images or files
- Click “Save” when finished
7.8 Time Tracking
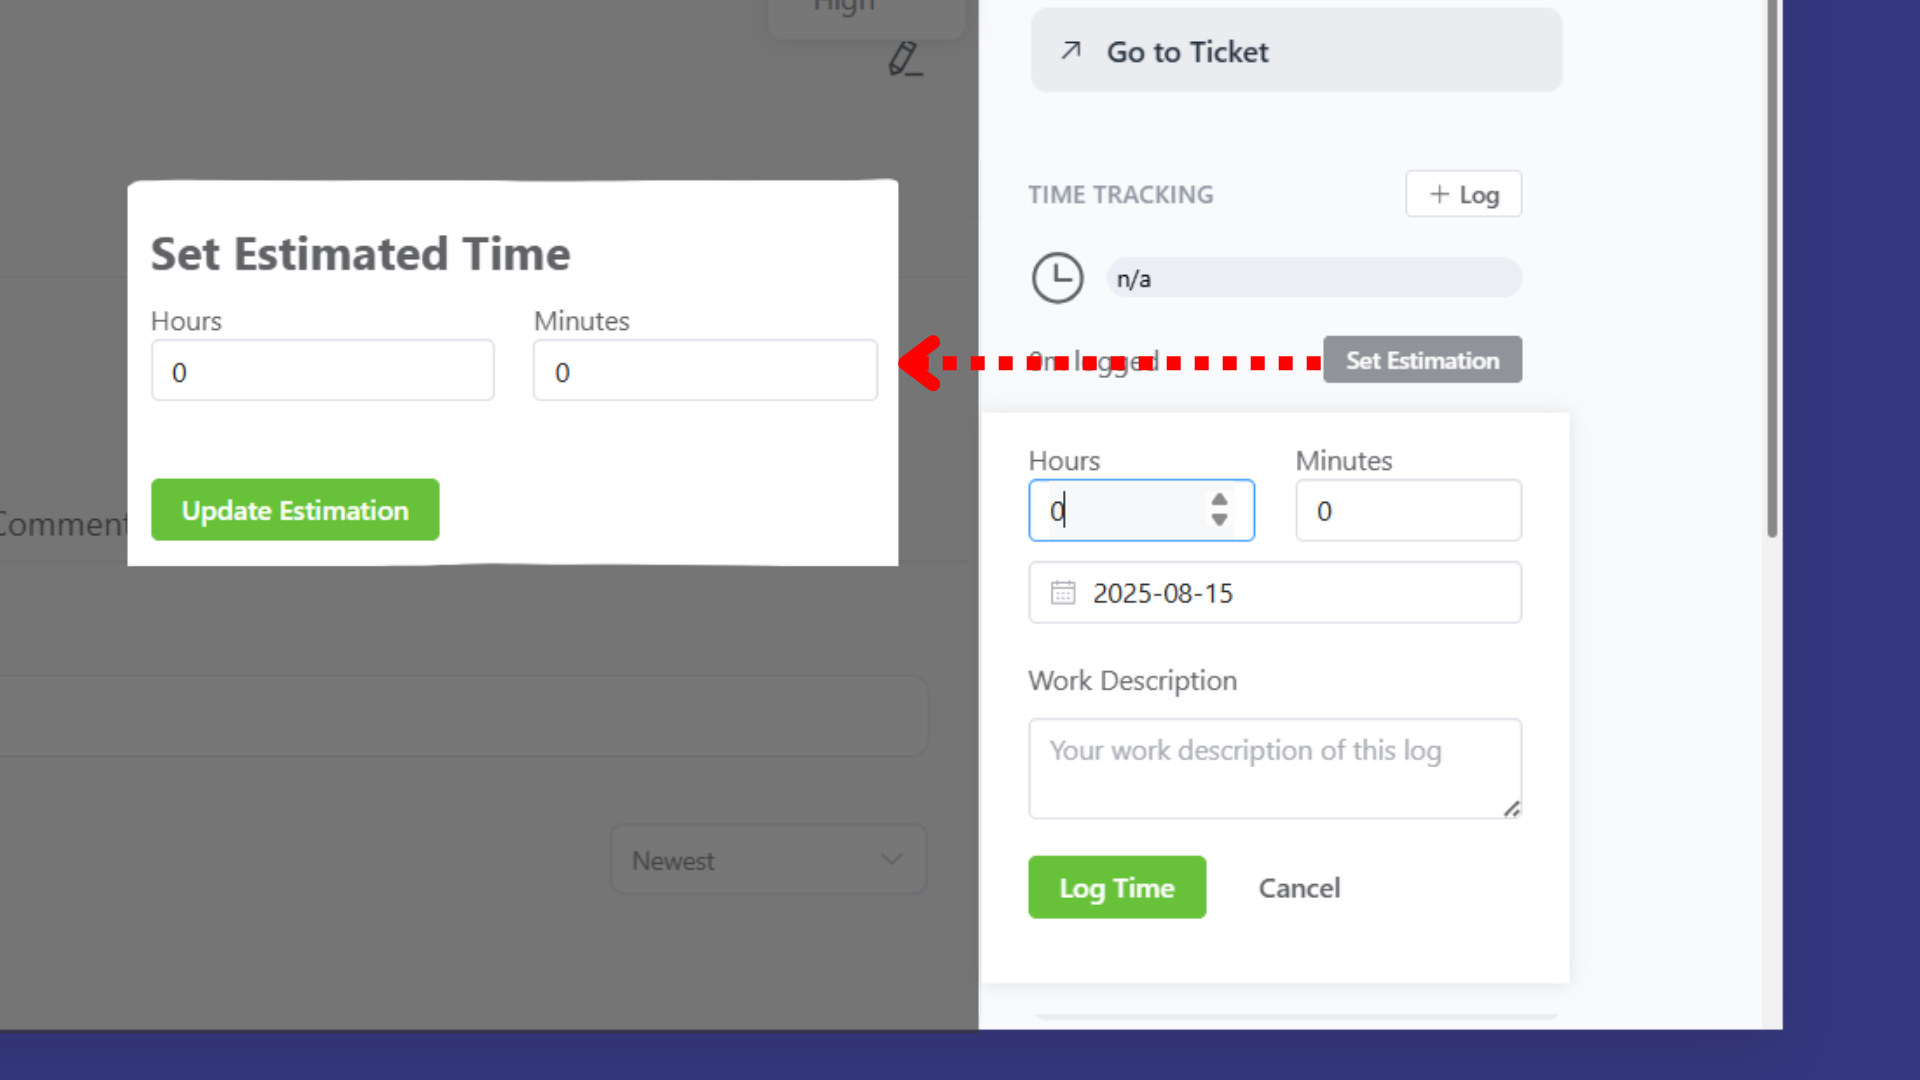
To track work time:
- Open the task details
- In the TIME TRACKING section, click “+ Log”
- Enter time spent:
- Hours and Minutes
- Date of work
- Work Description
- Click “Log Time” to save
- Use “Set Estimation” to set expected time
7.9 Adding Attachments
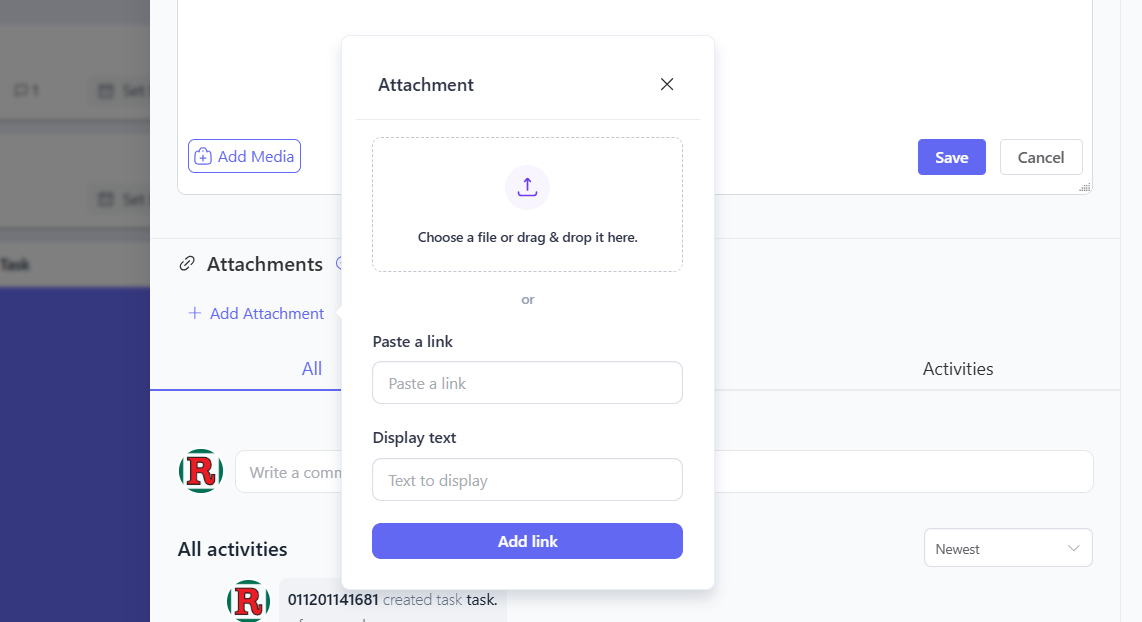
To attach files or links:
- Open the task details
- Click “+ Add Attachment”
- Choose attachment type:
- Upload File: Drag and drop or choose file
- Add Link: Paste URL and add display text
- Click “Add link” for URLs
7.10 Task Comments and Activities
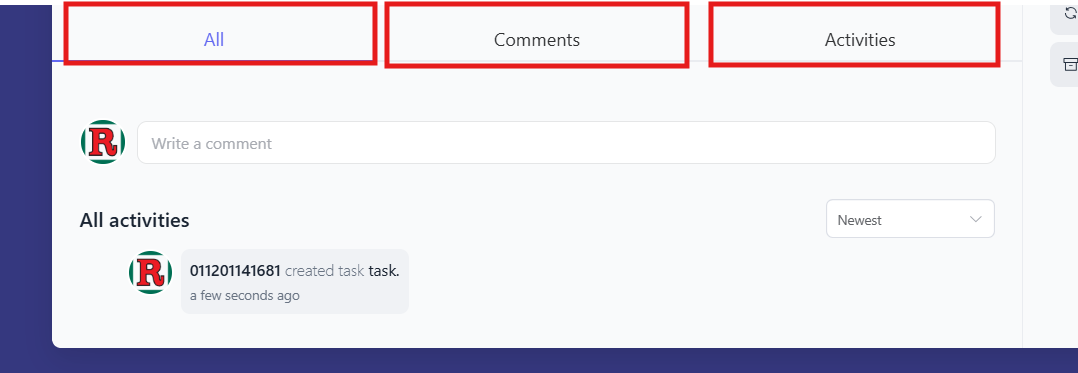
To communicate about tasks:
- Open the task details
- Use the tabs at the bottom:
- All: See everything
- Comments: View discussions
- Activities: See task changes
- Write a comment to add discussions
- View All activities to see task history
7.11 Converting a Task to Subtask
Sometimes you may need to reorganize your tasks by converting an existing task into a subtask under a parent task. This feature helps maintain better task hierarchy and project organization.
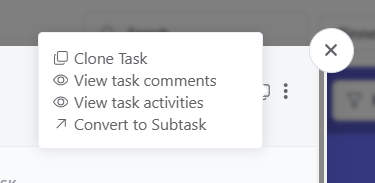
To convert a task to a subtask:
- Locate the task you want to convert in your task list
- Click the three dots (⋯) next to the task name to open the context menu
- Select “Convert to Subtask” from the dropdown menu options
- The Convert To Subtask dialog will appear
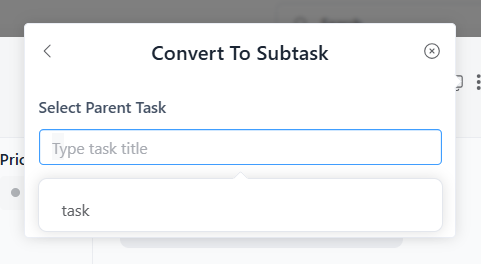
- In the Select Parent Task section, start typing the name of the parent task
- Select the appropriate parent task from the search results that appear
- Click “Convert” to confirm the conversion
Important Notes:
- The task will maintain all its existing properties (assignees, due dates, descriptions, etc.)
- The task will now appear as a subtask under the selected parent task
- You can only convert tasks to existing parent tasks
- Make sure you have appropriate permissions to modify both the task and the parent task
7.12 Moving Tasks Between Stages
To change task progress:
- Drag and drop tasks between stage columns (Open, In Progress, Completed)
- Or use the Move option in task details
- Tasks automatically update their status
- Team members get notifications of changes
Default Workflow Stages:
- Open: New tasks (1 task shown)
- In Progress: Active work (0 tasks shown)
- Completed: Finished tasks (0 tasks shown)
8. Project Views and Navigation
8.1 Kanban View
The default Kanban view provides:
Features:
- Visual workflow with drag-and-drop functionality
- Task cards showing key information
- Clear stage progression
- Real-time updates
8.2 List View
Switch to List view for:
Capabilities:
- Detailed task information in table format
- Better for managing large numbers of tasks
- Enhanced filtering and sorting options
- Bulk operations on multiple tasks
8.3 Calendar View
Use Calendar view for:
Benefits:
- Timeline-based task visualization
- Due date management
- Schedule planning and coordination
- Deadline tracking
9. Search and Filtering
9.1 Quick Search Functionality
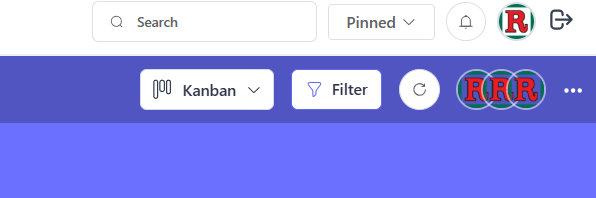
Using the Search Bar:
- Click the Search bar in the header
- A “Quick Search” modal appears
- Enter keywords to find tasks, projects, or content
- Results appear instantly as you type
9.2 Advanced Filtering
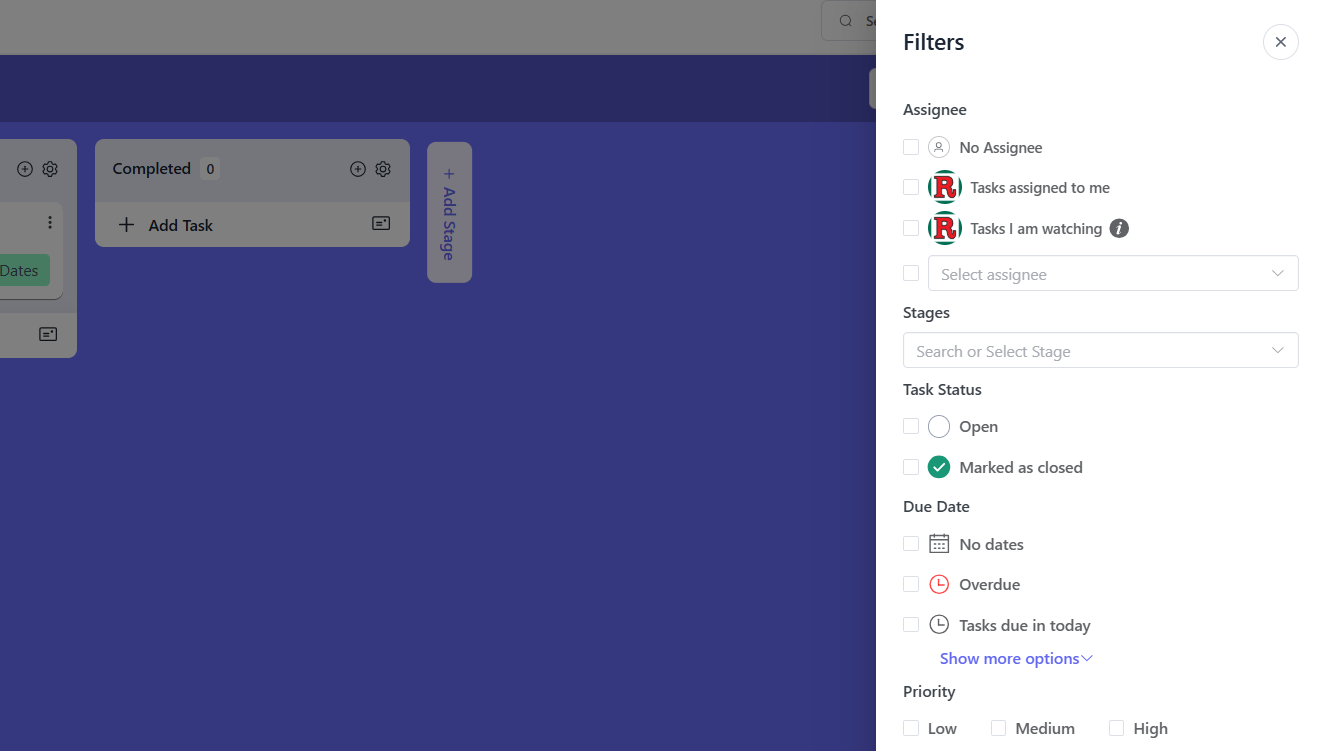
Filter Options:
- Click the “Filter” button
- Available filter options include:
- Task status (Open, In Progress, Completed)
- Priority levels (High, Medium, Low)
- Assigned team members
- Due date ranges
10. Reports and Analytics
10.1 Accessing Project Reports

To view project analytics:
- Click the “Reports” tab in your project
- System displays task summaries and charts
- View various analytics and performance metrics
10.2 Available Reports and Charts
Task Summary Information:
- Incomplete tasks count
- Completed tasks count
- Overdue tasks count
- Total tasks count
Visual Charts:
- Task Completion Chart: Breakdown of completed/incomplete/overdue tasks
- Task Priority Chart: Distribution of tasks by priority level (High, Medium, Low)
- Progress Charts: Visual representation of project progress
11. Project Lifecycle Management
11.1 Project Duplication
To create a copy of your project:
- Click the 3 dot button (⋯)
- Select “Duplicate Project”
- Configure duplication settings:
- Copy project structure and settings
- Include or exclude existing tasks
- Set up new project parameters
- Maintain consistent workflows
11.2 Project Archiving
To archive a completed project:
- Click the 3 dot button (⋯)
- Select “Archive Project”
- Confirm archiving:
- Maintain project for historical reference
- Remove from active project list
- Preserve all project data and history
- Keep organized project records
Key Points to Remember
- 3 Dot Button Access: Always click the 3 dot button (⋯) to access all project settings, team management, and configuration options
- Simple Project Creation: Create projects with just Title, Description, and Type – keep it simple and focused
- Team Management: Use “Project Members” option in Project Menu to add users and manage their roles (Member or Viewer)
- Project Customization: Use “Change Background” to customize project appearance with images or gradients
- Notification Control: Configure “Notification Settings” through the 3 dot button to manage team alerts
- Label Organization: Manage “Project Labels” through the 3 dot button to categorize and organize tasks effectively
- Activity Monitoring: Track all project changes through “Project Activity” accessed via the 3 dot button
- Task Workflow: Move tasks through Open → In Progress → Review → Completed stages using drag-and-drop
- Multiple Views: Switch between Kanban, List, and Calendar views based on your management needs
- Search and Filter: Use Quick Search and Filter buttons to find specific tasks and information quickly
- Reports Access: Click the Reports tab to view task summaries and analytics charts
- Project Duplication: Save time by duplicating successful project structures through the 3 dot button
- Project Archiving: Use “Archive Project” option to maintain organized project records when work is completed